PISTON UPGRADE
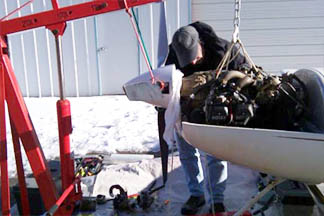
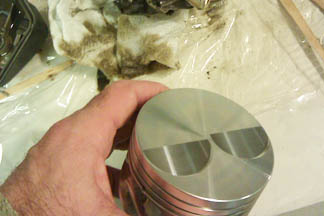
January of 2010 I chased down a number of items Ive wanted to take care of. The most significant of which was to install Jerrys pistons for a boost in horsepower since I fly around at high altitudes here in the southwest these days. Im glad to have made that improvement. Theres definitely a bit more throttle to work with. Its not like installing a jet engine, but every additional horsepower helps. Procedurally it was pretty straightforward to take apart the engine and make the replacement. It was also nice to clean out all of the carbon and check things out on the inside. The hard part was pulling the engine, disconnecting things and fighting with the usual mechanical hassles (bolts/hoses that dont want to budge, etc). I have to keep the plane outside (covered) these days, and unfortunately I couldnt secure any hangar space for the engine work. This has probably got to be the least recommended way to work on the engine, but it probably also required the least amount of teardown. Did I mention it was cold?
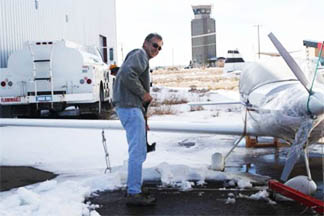
Shoveling a work area out of the snow!
Engine is pulled; pulling the cylinders.
Nice new high compression pistons.
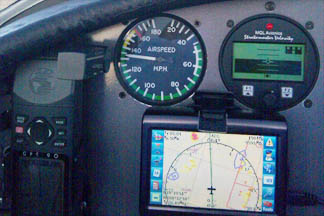
PANEL IMPROVEMENTS
I also added an electronic artificial horizon to my panel in January 2010. The southwest has some vast areas that get pretty dark at night, and without a moon and no cities on the ground, Ive had to stop short of home a number of times to avoid any potentially disorienting conditions. I didnt want a vacuum system, so the MGL Velocity AHRS is small, lightweight and a nice addition to my panel. Having read the documentation about the limitations and knowing that electronic gyros can sometimes have questionable performance, I called the company before buying it. He said I would be happy with the performance, and so far it is great.
I added the smallest voltmeter I could find to squeeze into my panel, and I replaced the failing Rotax regulator. The regulator was only putting out about 11.8 volts at the time. The volt meter has also saved the day (night) again; on a long flight during transition from day to night, I checked the volt meter before switching on lighting and noticed it was only around 12 volts. I opted to land and check things out before continuing and sure enough, the main fuse had a connection issue in the engine compartment. It was an easy fix before continuing on at night, but some day I'll probably rework that fuse installation from the original design.
MAINTENANCE ISSUES
Here are a few of the maintenance items I've had to address:
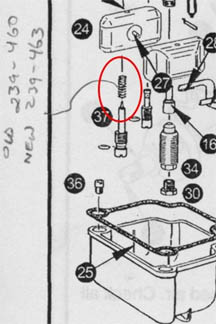

Carburetor: For some period of time, I had problems with engine roughness during hot/warm starts. It was never a problem during initial cold starts. Even after a rough warm start, it would calm down soon enough. It acted like vapor lock of some kind, but I could never track down the problem until one day the engine never smoothed out after start up. Fortunately, I had the help of a fellow kit builder who was good with Rotax engines. We tore down both carbs, and the problem was a corroded internal spring that started clogging some of the small fuel pathways. I suspect these particular springs corroded due to moisture from running fuel with ethanol. I replaced springs in both carbs. If youve experienced similar engine behavior, this might be something to consider. The springs can be accessed from the float bowl without having to tear apart the entire carburetor. I also keep the passageways clean by removing the air filter and using carb cleaner in the small hole at the bottom of the carburetor. However, if corrosion is in fact a problem, it is worth taking everything apart to clean things up.
Incidentally, any hooked tension spring can have this problem, and I've had to replace the external carburetor springs with exactly the same issue.
I keep a T-handle spring puller available to easily perform checks on the heavier tension springs.
I have since replaced the tabs with metal loops to prevent the wear. I highly recommend that modification.
FUEL SYSTEM
During the 2012 / 2013 winter timeframe, I reworked several fuel system issues. Two significant issues were a concern: degradation of the fuel cap & epoxy interface and fuel smell in the cockpit. I had chased several items to get rid of the fuel smell, but the main culprits turned out to be the fuel line shutoff valve at the wing tank end plate and the fuel selector valve in the cockpit. Ultimately, I pulled all the automotive style fuel lines out and replaced them with PTFE Teflon lines. I removed the shutoff valves at the wing tank close outs since they were of little value anyway and only served as another source for leaks. I also finally broke down and bought the expensive Andair fuel selector valve. It's an expensive valve compared to the one I was using, but it has proven to be a good product with no leakage or fuel smell.
I opened up all of my fuel tanks and ripped out the degraded epoxy/fiberglass around the aluminum filler caps. After cleaning and making basic repairs, I recoated everything with Jeffco / Novalac epoxy. This is a superior product for the fuel tanks, and one that I wish I knew about in the very beginning.
I learned that polysulfide sealant is meant to be used where surfaces mate together with sufficient surface area. It is not a general purpose sealant and breaks down when immersed in fuel. Rather, if only an edge of the sealant is exposed and it is sandwiched between lots of flat surfaces for any fuel path, it is the sealant of choice. Jeffco, on the other hand, is meant as a surface barrier to the fuel. The Jeffco and polysulfide have complementary but mutually exclusive uses to solve fuel containment issues. Any aluminum & epoxy interface in the original construction will be attacked and eventually break down. It's possible the Jeffco / aluminum interface will be a more permanent solution.
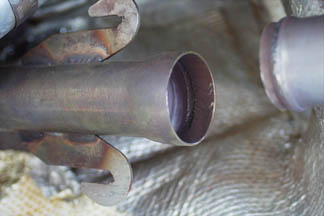
NOSE GEAR
The Pulsar nose gear developed stress cracks throughout the community, several leading to failure. My nose gear was no exception, and fortunately I made the decision to modify it before it failed. Upon close inspection while prepping for the mod, I discovered a significant crack that was an impending failure. The original design had weldments around a 5/8" spindle. The modification called for cutting that part off and welding a sleeve or collar for a bolt / spindle. This modification reduced stress on the welds by over a factor of six!
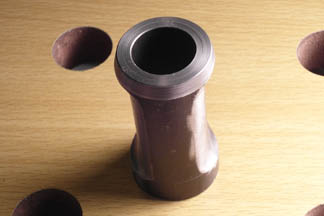
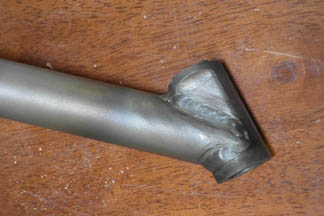
This is the newly manufactured sleeve or collar to weld onto the existing nose gear strut. I manufactured this part from 4130 chromoly steel, which was the first time I've worked with a material that difficult. This simple part took a couple / few days to make, learning what worked and what did not work. The sides were ground down and then milled to higher precision with a cobalt end mill. I found grinding worked much better to remove significant material and I just reserved the machining for finishing activities. The narrower sides allowed for the strut to fit over more material and reduced stress on the welds even more.